How to Deploy a Next.js App for Free in 2026 (Complete Beginner's Guide)
Learn what Next.js is and how to deploy your Next.js application for free using MS Host. From GitHub integration to automatic deployments, this beginner-friendly guide gets your project live in minutes.

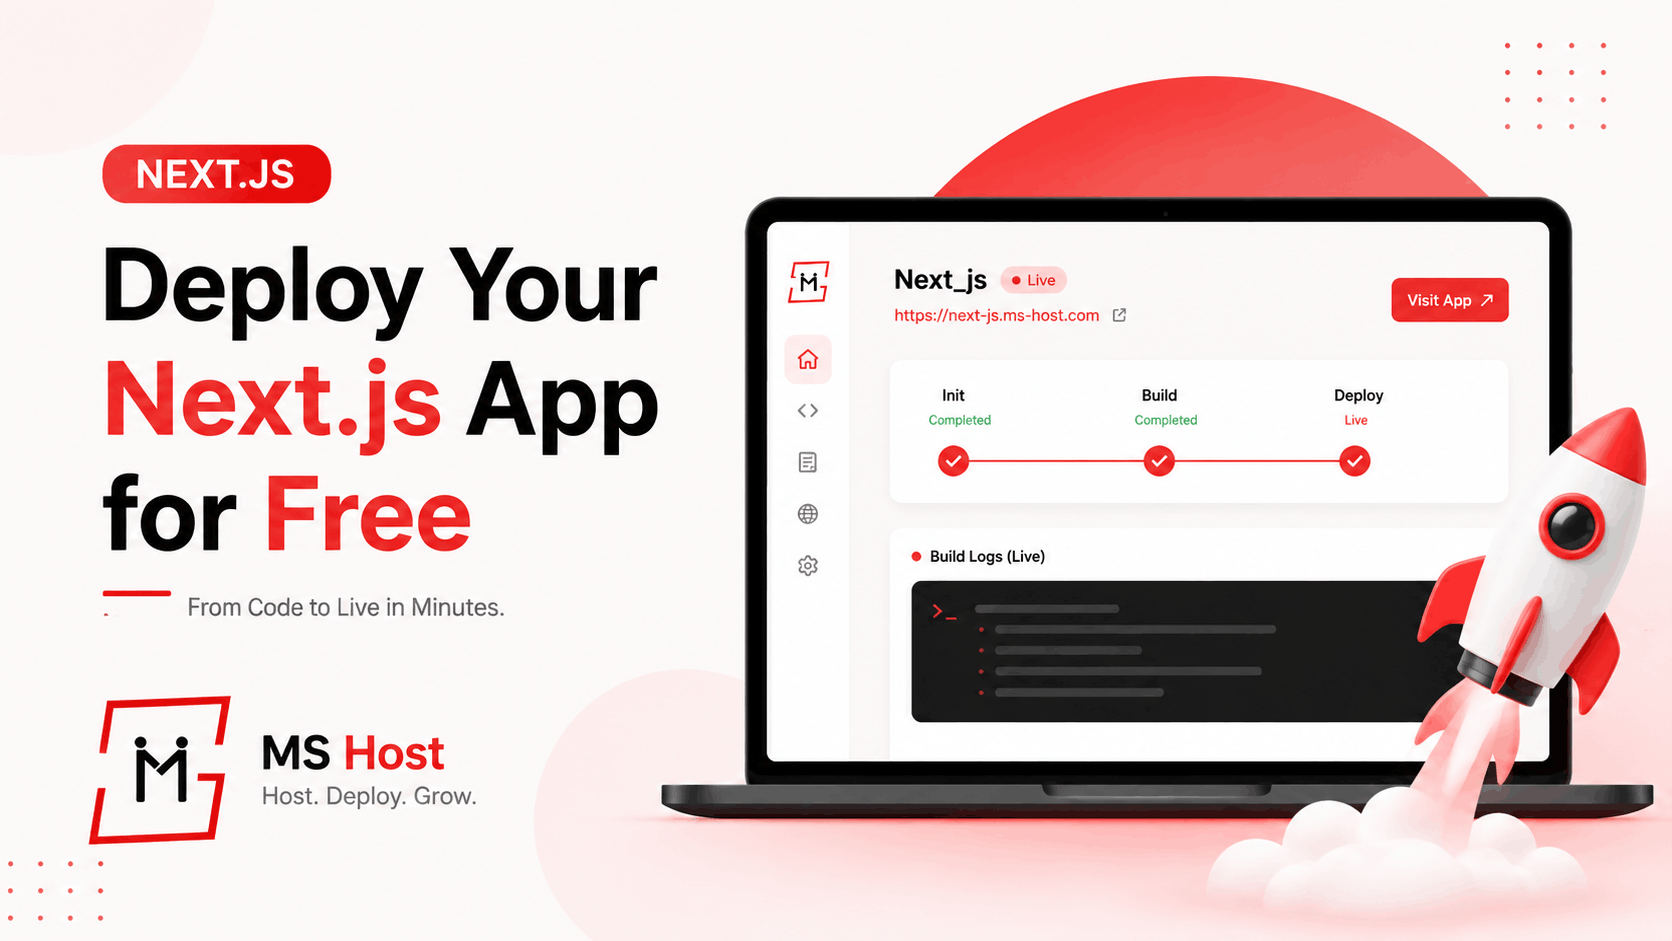
Learn how to deploy a Next.js application for free in minutes using a modern hosting platform.
Introduction
Every developer reaches the same moment.
You've spent hours building a beautiful Next.js application. The pages load fast, the UI looks great, and everything works perfectly on localhost.
Then comes the question:
"Where do I deploy it?"
Many hosting providers offer free plans, but they often come with limitations, complicated setup processes, or unexpected costs once your project starts growing.
The good news is that deploying a Next.js application in 2026 is easier than ever.
In this guide, you'll learn how you can deploy your Next.js project completely free.
The Biggest Challenge: Deployment
Building locally is easy.
Deployment is where many beginners get stuck.
Common questions include:
- Which hosting provider should I choose?
- How much will it cost?
- Do I need a VPS?
- Do I need Linux knowledge?
- How do I connect GitHub?
These questions stop thousands of projects from ever going live.
Deploying Next.js for Free
This is where MS Host becomes interesting.
Instead of manually configuring servers, setting up reverse proxies, or learning DevOps, you can deploy directly from your repository.
The process is designed to be straightforward:
- Create an account.
- Connect your GitHub repository.
- Select your Next.js project.
- Configure deployment settings.
- Click deploy.
Within minutes, your application can be available online.
Why Developers Are Choosing MS Host
Free Deployment
Perfect for students, side projects, portfolios, and startups.
Modern Framework Support
Supports modern JavaScript frameworks, including:
- Next.js
- Node.js
- NestJS
- Vite
Custom Domains
Connect your own domain name and create a professional online presence.
SSL Included
HTTPS support helps keep your website secure.
Beginner-Friendly
No server management required.
No complicated Linux commands.
No infrastructure headaches.
Prefer a Video Tutorial?
If you'd rather watch the complete deployment process instead of following the written guide, we've got you covered.
This step-by-step video walks you through the entire process of deploying a Next.js application on MS Host, from connecting your GitHub repository to launching your project online. You'll also learn how to configure deployment settings, monitor build logs, and access your live application in just a few minutes.
Watch the complete tutorial here:
After watching the video, you can continue with the written guide below for additional explanations, screenshots, and deployment tips.
Step-by-Step Next.js Deployment Guide
Step 1: Push Your Project to GitHub
Initialize Git:
git init
git add .
git commit -m "Initial commit"
Push the repository to GitHub.
Step 2: Open MS Host
Visit:
host.meerasolution.com
Create an account.
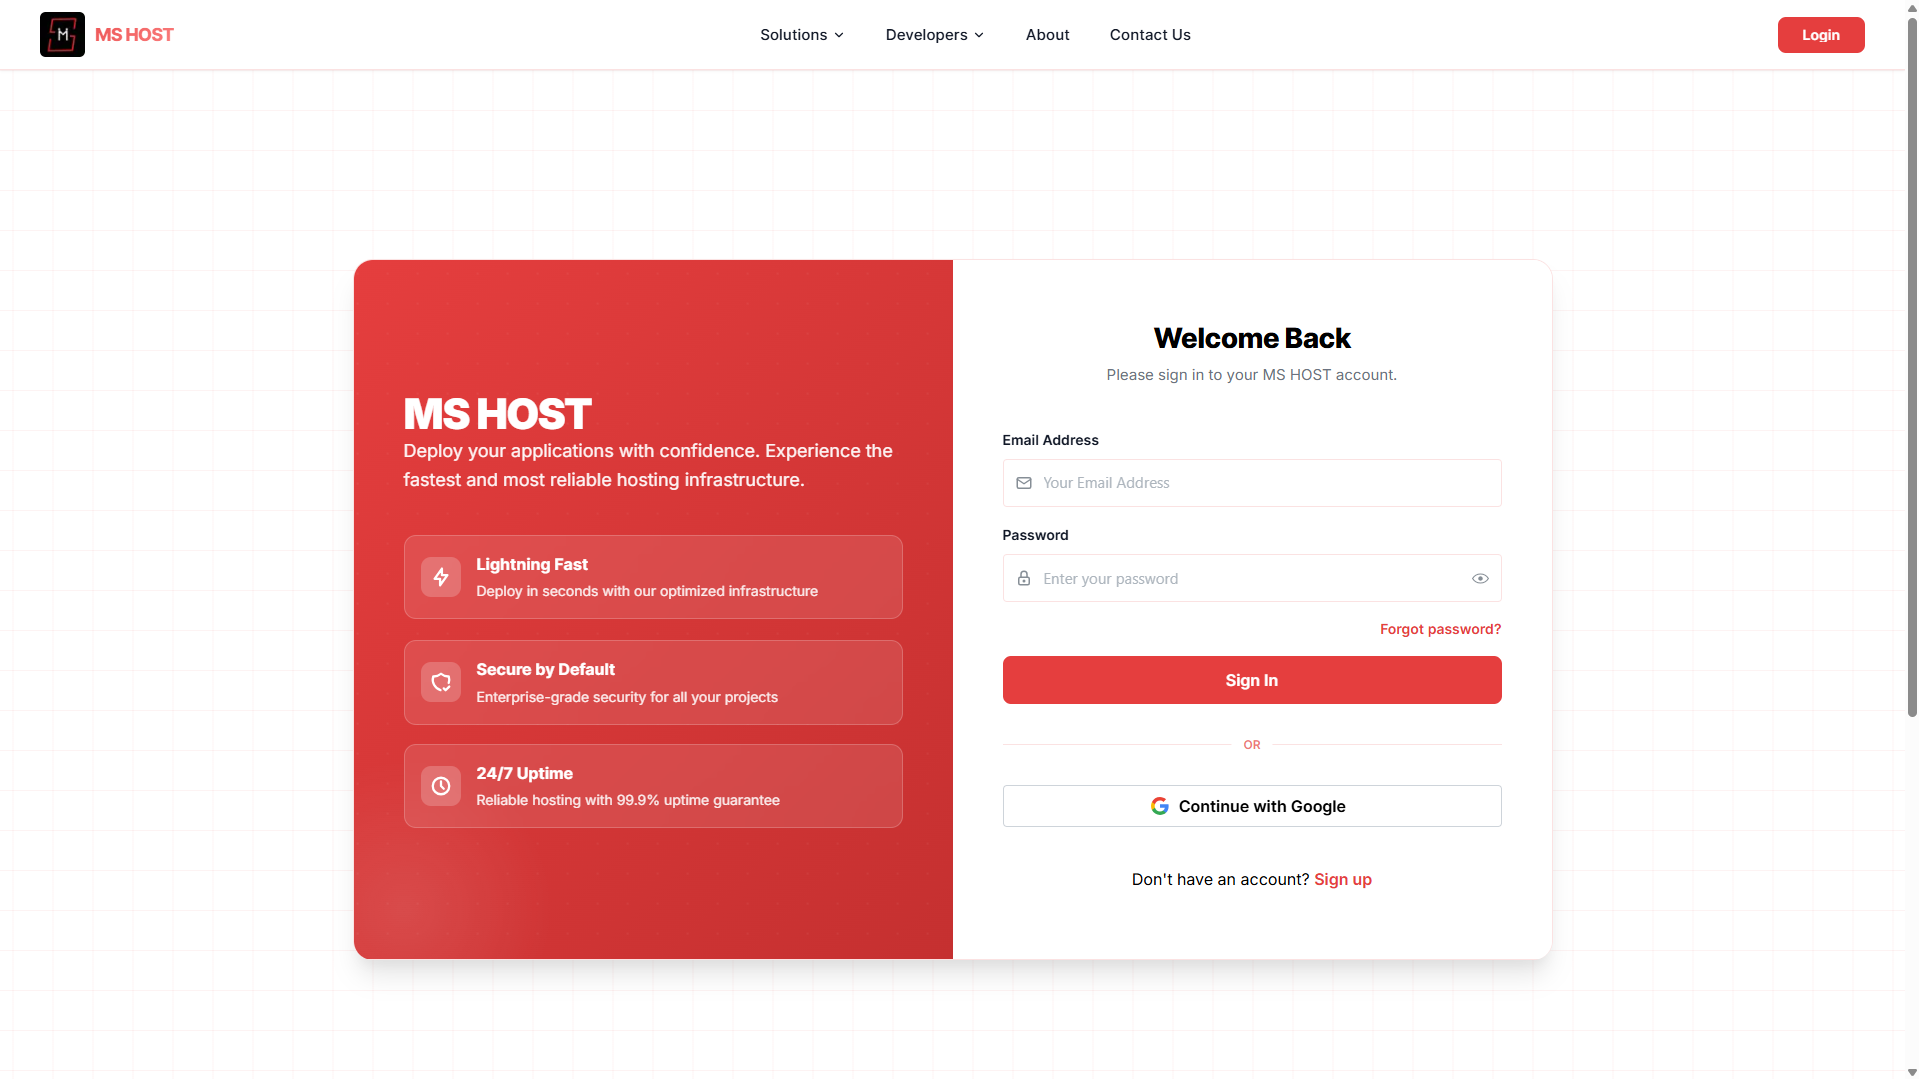
Step 3: Connect Your Repository
Authorize GitHub access.
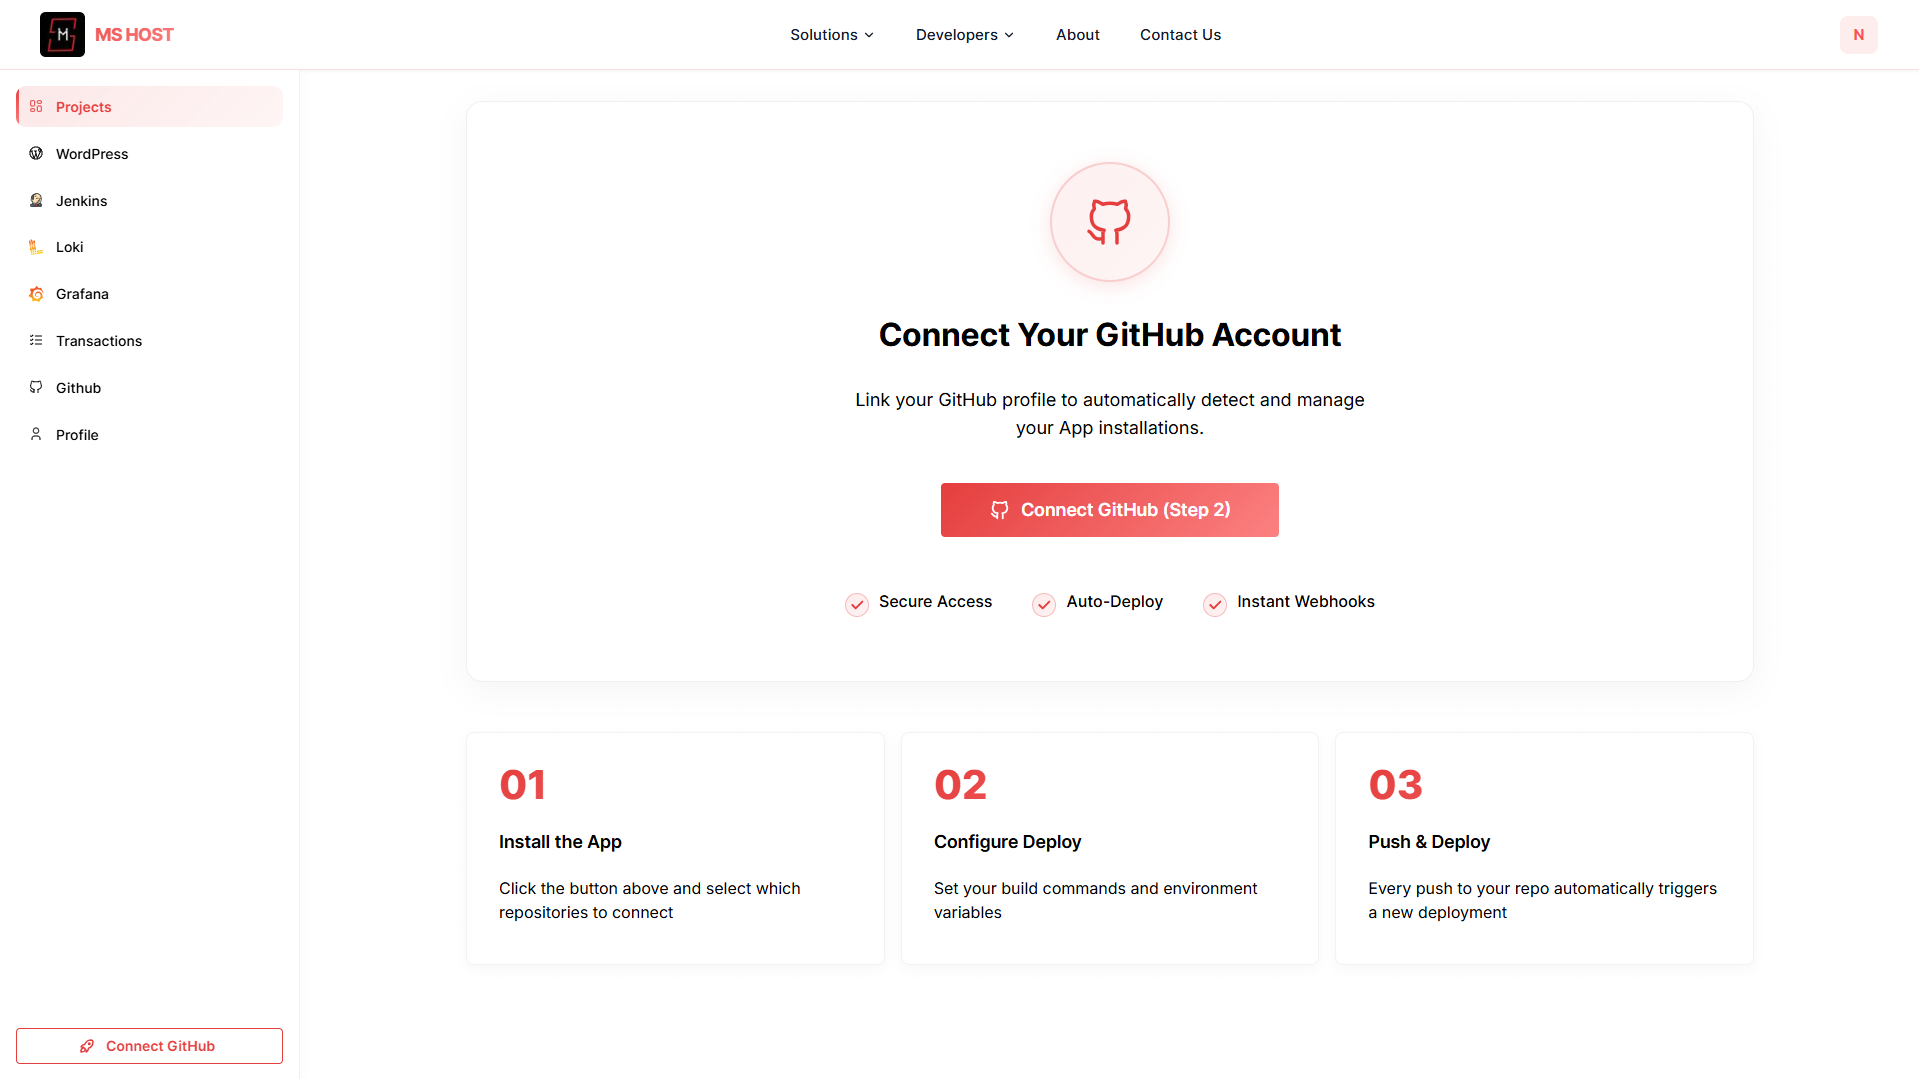
Choose the repository you want to deploy.
Step 4: Deploy Your Next.js Project on MS Host
After connecting your GitHub repository, deploying a Next.js application takes just a few simple steps.
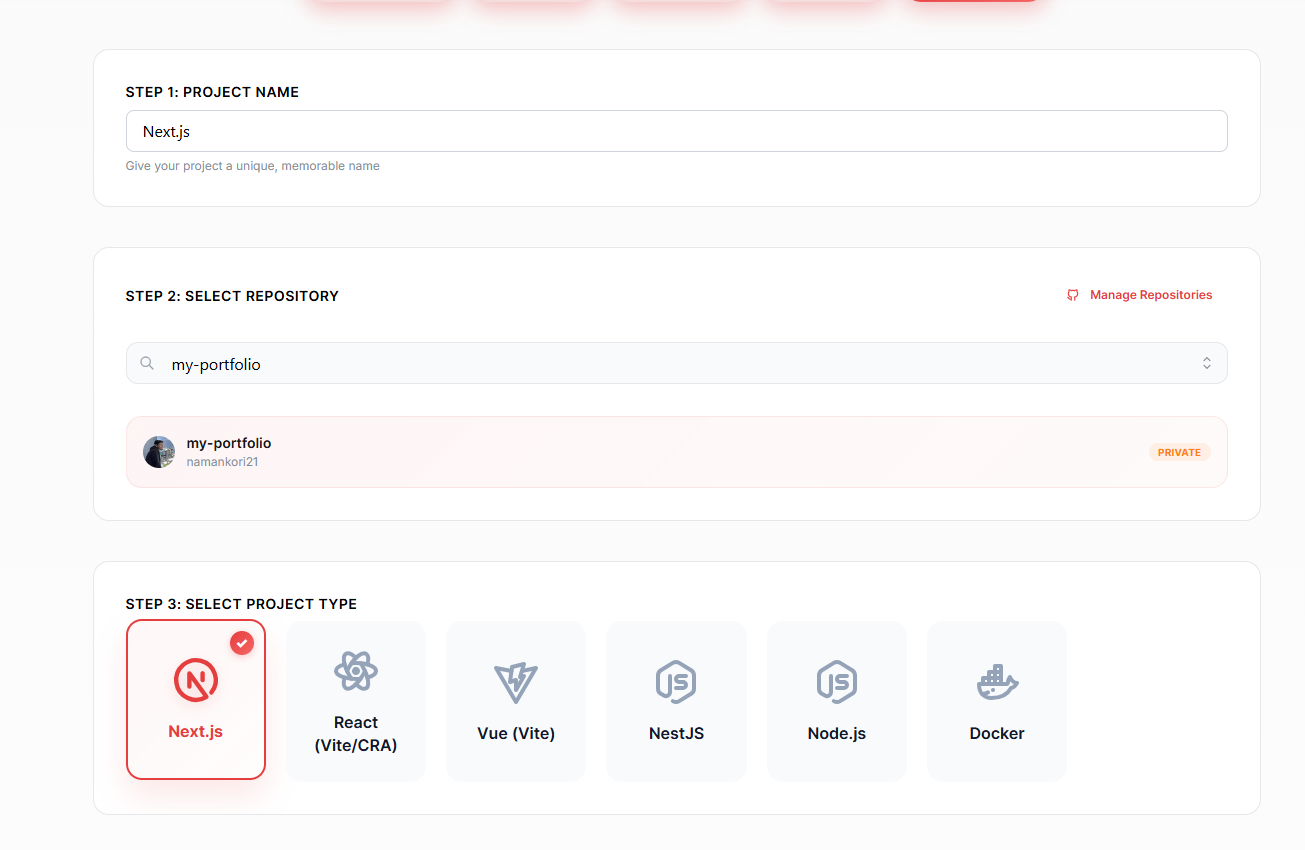
Step 1: Project Name
Start by entering a name for your project.
Step 2: Select Repository
Choose the GitHub repository containing your Next.js application.
MS Host automatically fetches your repositories after GitHub authorization, allowing you to search and select the correct project without manually entering repository URLs.
Step 3: Select Project Type
Choose Next.js from the available project types.
MS Host currently supports multiple deployment options, including the following:
- Next.js
- React (Vite/CRA)
- Vue (Vite)
- NestJS
- Node.js
- Docker
Selecting the correct project type allows the platform to automatically configure the deployment environment for your application.
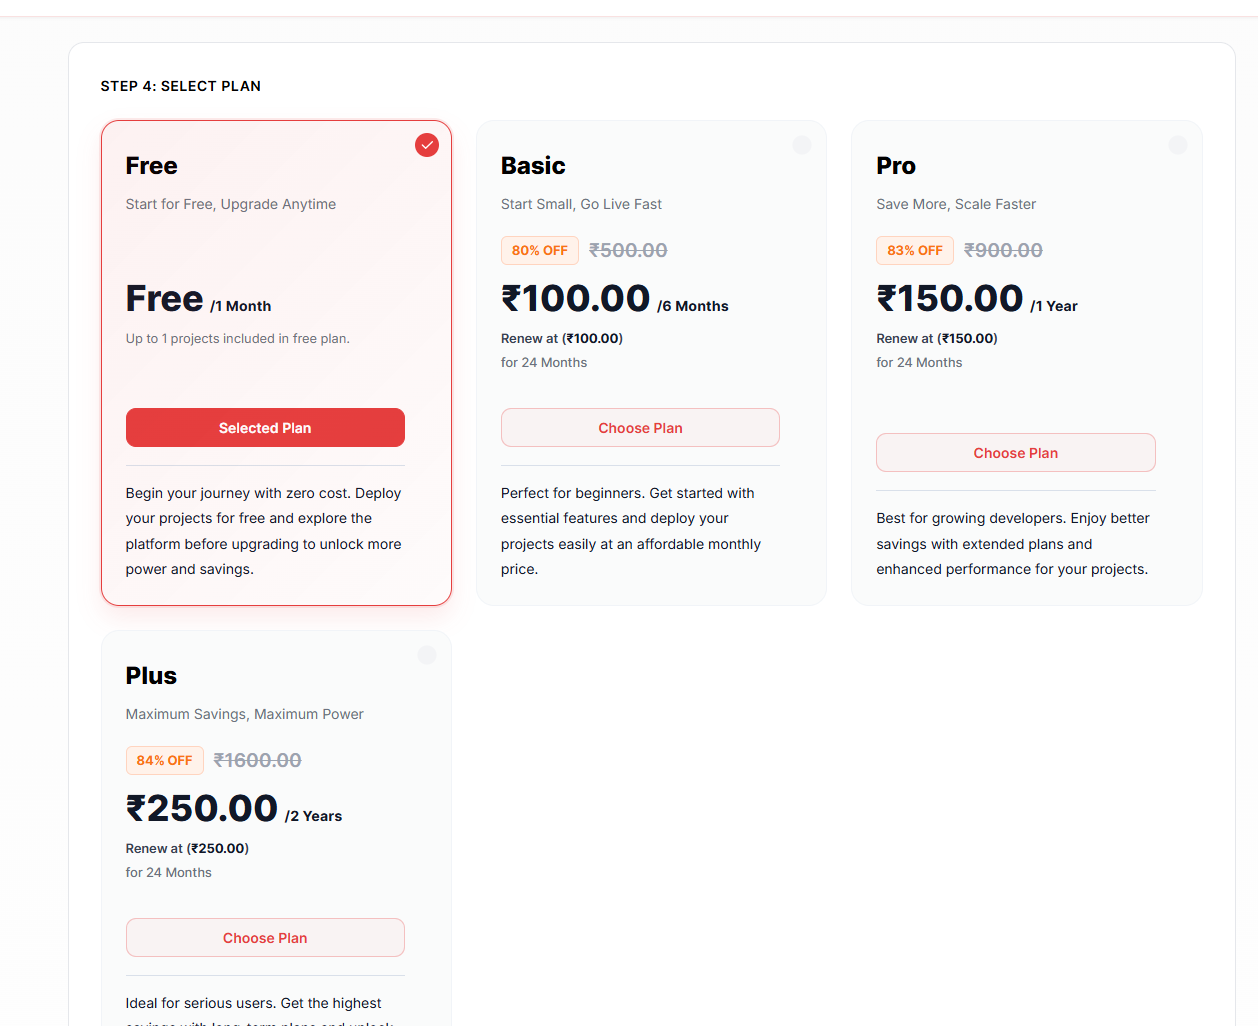
Step 4: Select Plan
Choose the hosting plan that best fits your needs.
For most developers, students, and personal projects, the Free Plan is the perfect starting point.
The Free Plan allows you to:
- Deploy one project at no cost
- Test the platform before upgrading
- Launch portfolios, blogs, and side projects
- Learn deployment without spending money
As your project grows, you can upgrade to Basic, Pro, or Plus plans for additional resources and features.
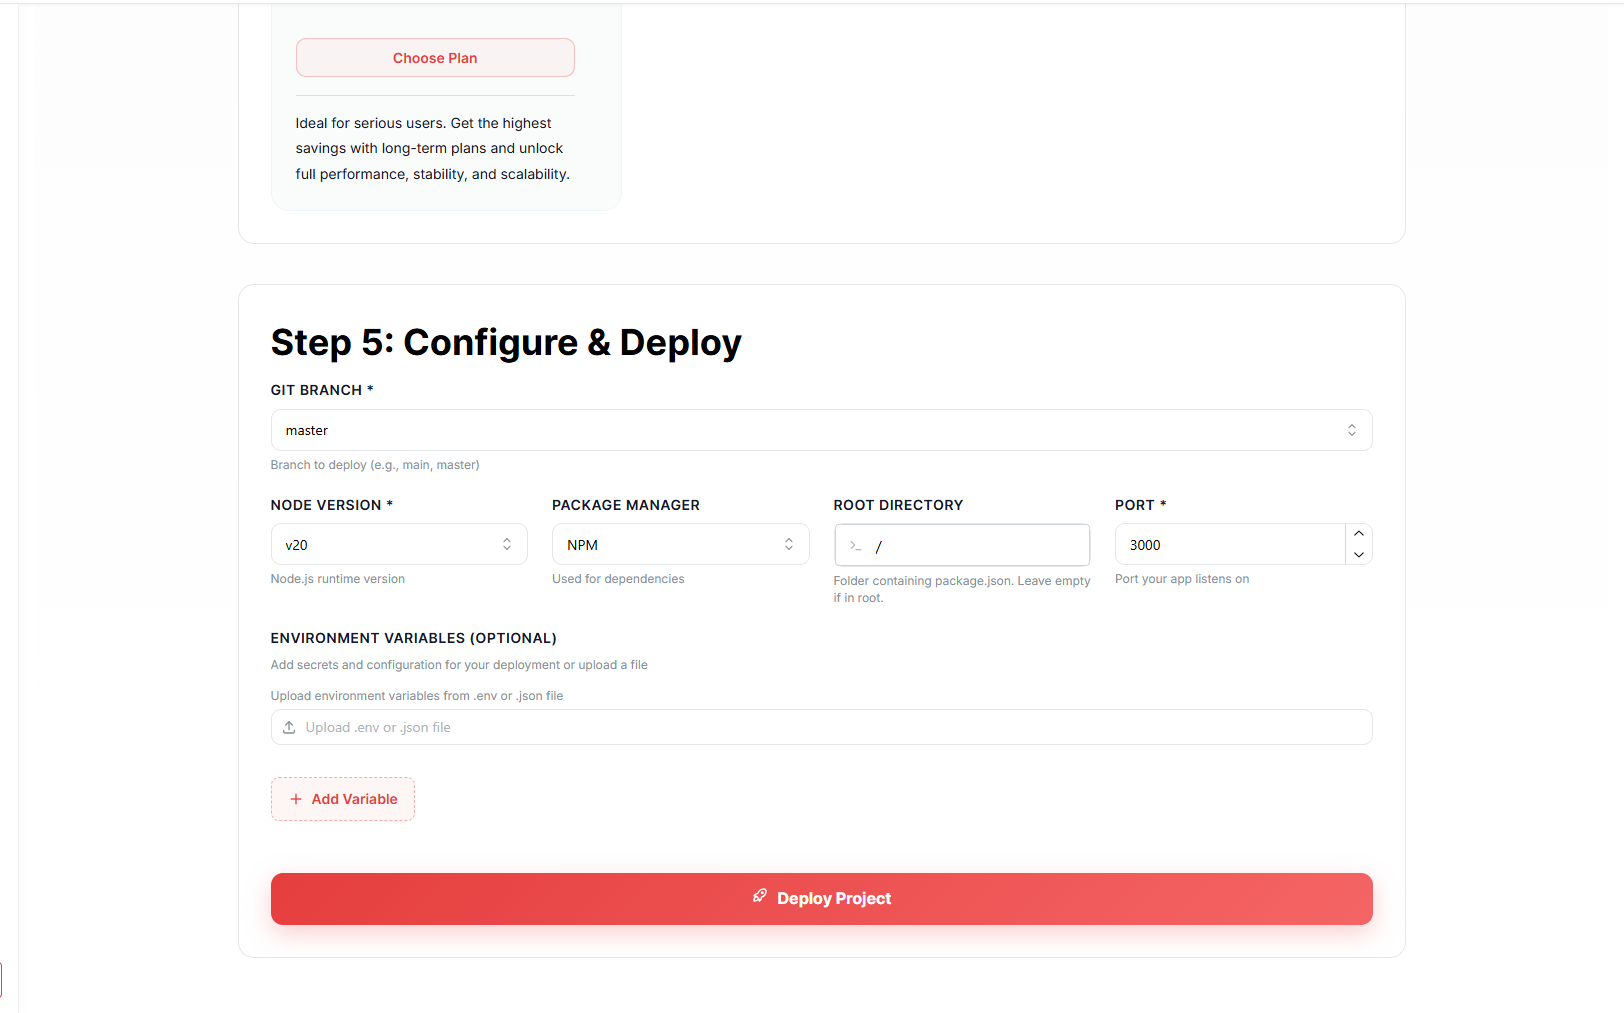
Step 5: Configure & Deploy
Review and configure your deployment settings.
You'll be able to select:
Git Branch
Choose the branch you want to deploy.
mainor
masterNode.js Version
For modern Next.js applications, use:
v20Package Manager
Select the package manager used by your project:
npm
yarnpnpm
Root Directory
If your Next.js application is in the repository root, leave the following:
/If you're using a monorepo, specify the folder containing the Next.js application.
Port
The default port is:
3000Most Next.js projects won't require any changes.
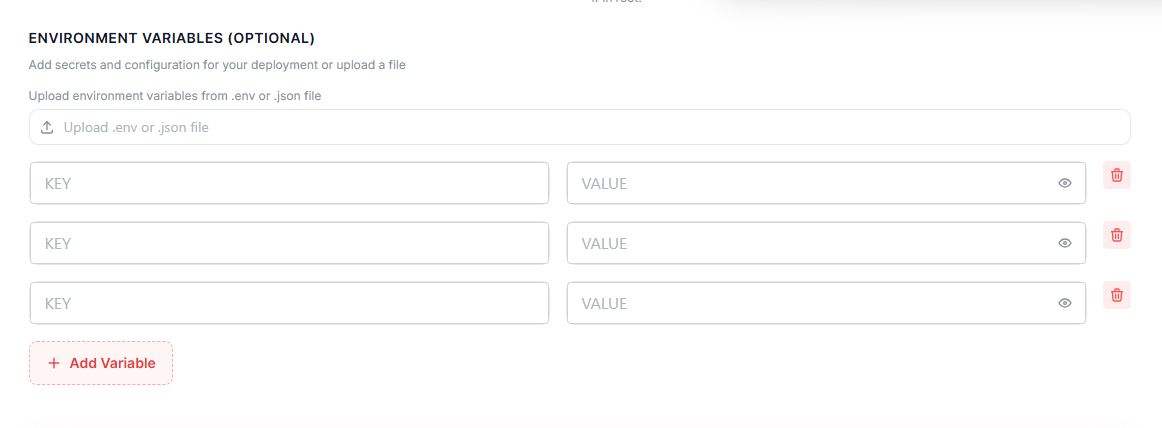
Environment Variables (Optional)
If your application uses external services, APIs, or databases, add your environment variables before deployment.
Example:
DATABASE_URL=your_database_url
NEXT_PUBLIC_API_URL=https://api.example.com
JWT_SECRET=your_secret_key
You can either upload a .env file or manually add variables using the Add Variable button.
Step 5: Deploy
Click Deploy.
The platform handles the build process and deployment automatically.
Step 6: Monitor Your Deployment
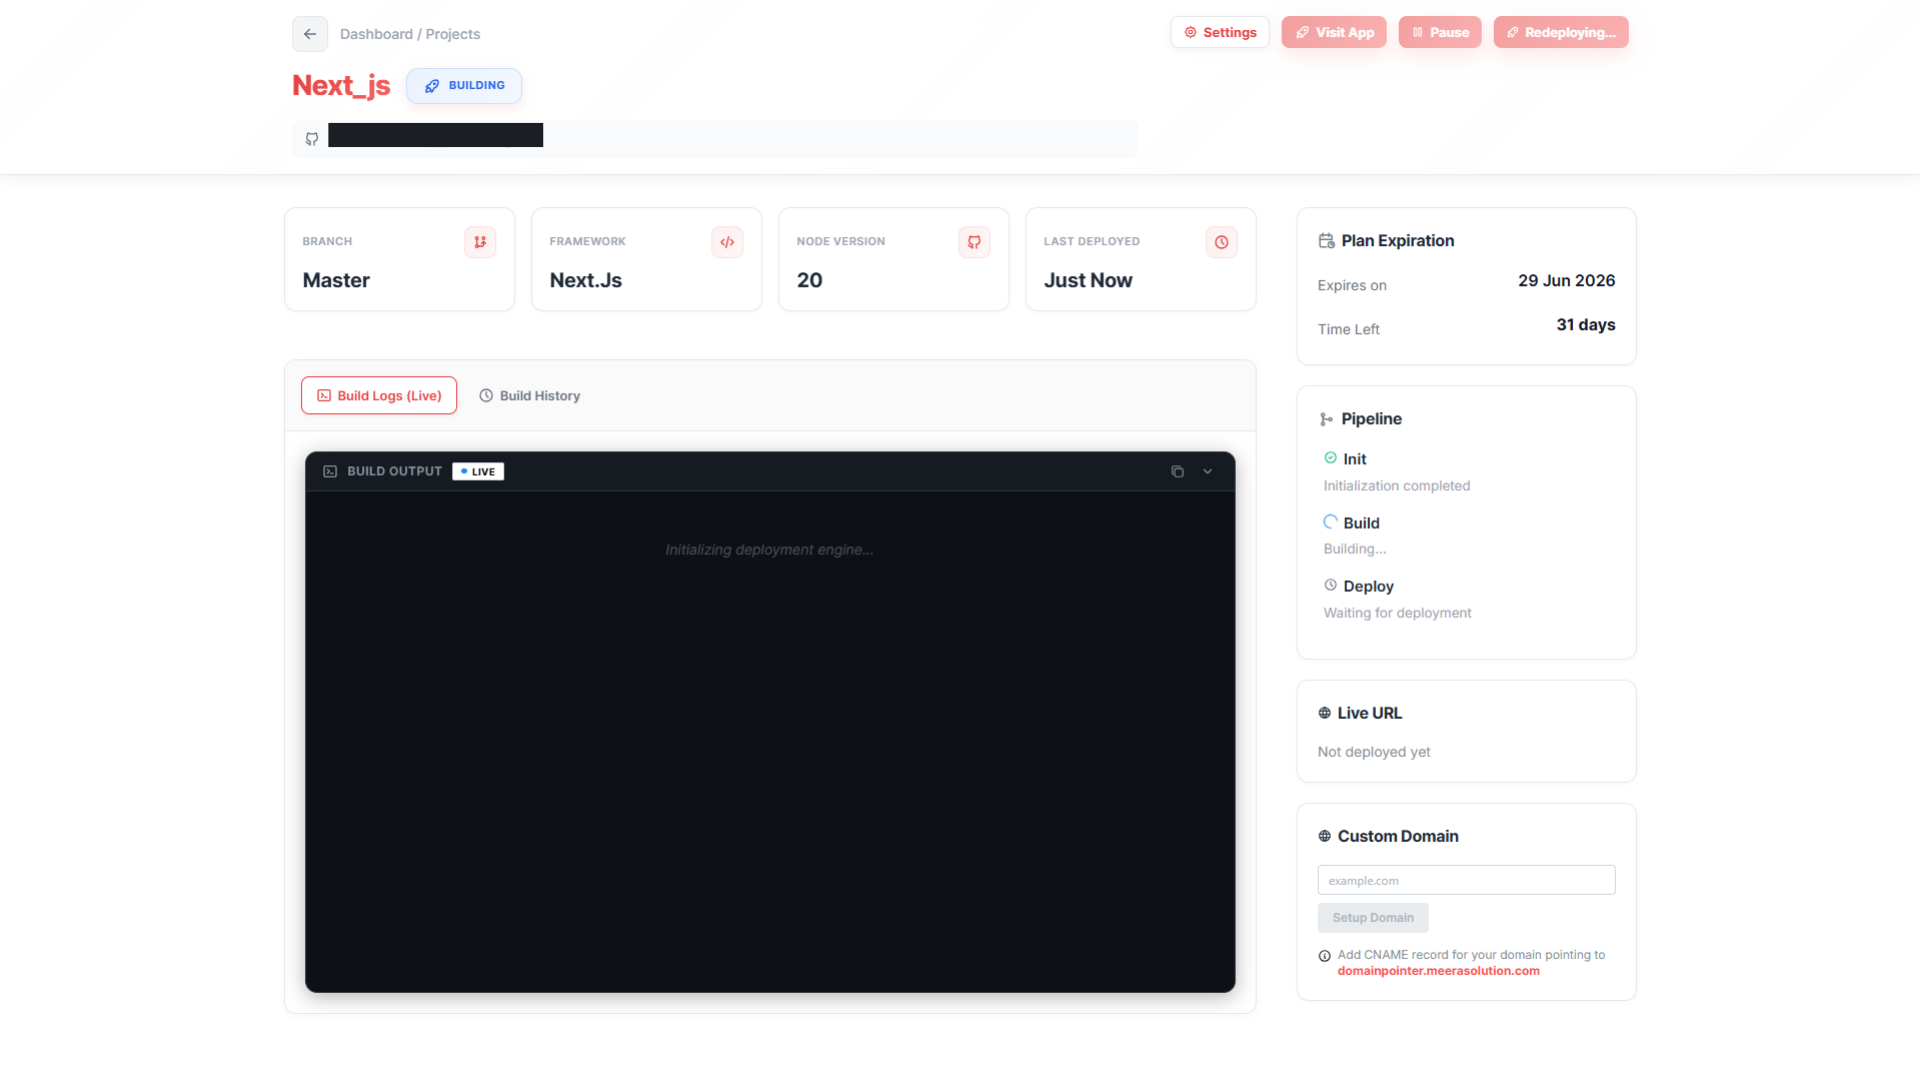
After clicking Deploy Project, MS Host automatically creates your project and opens a deployment dashboard where you can monitor everything in real time.
This dashboard acts as the control center for your application.
Watch Live Build Logs
One of the most useful features is the Build Logs (Live) section.
Instead of guessing what's happening behind the scenes, you can watch the entire deployment process in real time.
The logs show:
- Dependency installation
- Build progress
- Framework detection
- Deployment status
- Errors and warnings
- Successful deployment confirmation
If something goes wrong, the logs make troubleshooting much easier.
For beginners, this is a great way to understand what actually happens when an application is deployed.
Track the Deployment Pipeline
On the right side of the dashboard, you'll see the deployment pipeline.
The deployment process moves through three stages:
Init
The platform prepares the deployment environment and fetches your repository.
Build
Your Next.js application is installed and compiled.
Deploy
The built application was launched and made available online.
As each stage completes, the dashboard updates automatically so you always know the current deployment status.
View Project Information
The dashboard also displays useful project details such as the following:
- Git branch
- Framework type
- Node.js version
- Last deployment time
- Project status
This makes it easy to verify that the correct version of your application is running.
Access Your Live Application
Once deployment finishes successfully, the Live URL section will display your public application URL.
Simply click the link to open your website.
This is the moment every developer loves—seeing a project that was running locally become available to the entire world.
Connect a Custom Domain
Want a professional URL instead of a generated deployment address?
MS Host allows you to connect your own domain.
Simply:
- Enter your domain name.
- Click Setup Domain.
- Add the provided CNAME record in your domain provider.
- Wait for DNS propagation.
After verification, visitors can access your application using your custom domain.
For example:
my-nextjs-project.comInstead of:
random-project.ms-host-domain.comThis is especially useful for portfolios, business websites, SaaS products, and personal brands.
Final Thoughts
Building a modern web application has never been easier.
With Next.js, developers get a powerful framework that combines performance, SEO, scalability, and an excellent developer experience into a single package. Whether you're creating a personal portfolio, a startup MVP, a business website, or a full-scale SaaS platform, Next.js provides the tools needed to build fast and reliable applications.
But building an application is only half the journey.
The real goal is getting your project online where users, clients, and customers can actually experience what you've created.
Traditionally, deployment involved managing servers, configuring Linux environments, setting up SSL certificates, handling reverse proxies, and maintaining infrastructure. For many developers, especially beginners, these tasks often became unnecessary roadblocks.
Platforms like MS Host simplify that entire process.
From connecting a GitHub repository and selecting a project type to deploying a live Next.js application in just a few clicks, the platform removes much of the complexity associated with modern hosting. Features like live build logs, deployment monitoring, and custom domain support.
Perhaps the most valuable feature is the ability to start for free. Students can showcase their projects, freelancers can launch client websites, startups can validate ideas, and developers can experiment without worrying about hosting costs.
The workflow is simple:
- Build your Next.js application.
- Push your code to GitHub.
- Deploy it on MS Host.
In a world where speed matters, the ability to move from an idea to a live website within minutes can make a significant difference.
So if you've been waiting for the right moment to publish your Next.js project, this is it.
Your code is ready.
Your repository is ready.
Now it's time to launch your application and share it with the world. 🚀